
(1)布局文件:一个button
<RelativeLayout xmlns:android="http://schemas.android.com/apk/res/android"
    xmlns:tools="http://schemas.android.com/tools"
    android:layout_width="match_parent"
    android:layout_height="match_parent"
    android:paddingBottom="@dimen/activity_vertical_margin"
    android:paddingLeft="@dimen/activity_horizontal_margin"
    android:paddingRight="@dimen/activity_horizontal_margin"
    android:paddingTop="@dimen/activity_vertical_margin"
    tools:context=".MainActivity" >

    <Button
        android:id="@+id/button1"
        android:layout_width="200dp"
        android:layout_height="100dp"
        android:layout_alignParentTop="true"
        android:layout_centerHorizontal="true"
        android:layout_marginTop="162dp"
        android:background="@drawable/button_shape"
        android:text="Button" />

</RelativeLayout>
(2)在res文件夹中创建drawable文件,创建button_shape.xml文件

<?xml version="1.0" encoding="utf-8"?>
<shape xmlns:android="http://schemas.android.com/apk/res/android"
    android:shape="rectangle" >

    <!-- 圆角的角度 -->
    <corners android:radius="40dp"
        android:topLeftRadius="30dp"
        android:topRightRadius="30dp" />

    <!-- 边距 -->
    <padding
        android:bottom="7dp"
        android:left="7dp"
        android:right="7dp"
        android:top="7dp" />

    <!-- 颜色的过渡方案  angle为梯度 -->
    <gradient
        android:angle="45"
        android:endColor="#80FF00FF"
        android:startColor="#FFFF0000" />

</shape>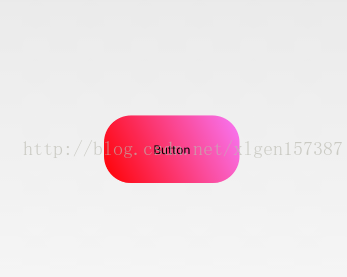
本文标题:Android学习笔记之圆角的实现
本文链接:https://blog.quwenai.cn/post/3680.html
版权声明:本文不使用任何协议授权,您可以任何形式自由转载或使用。

之Activity窗口是如何创建的?基于Android7.0源码")
之如何理解Window和窗口的关系?基于Android7.0源码")
之token到底是什么?基于Android7.0源码")
还没有评论,来说两句吧...